How to record video: Difference between revisions
No edit summary |
No edit summary |
||
| (8 intermediate revisions by the same user not shown) | |||
| Line 8: | Line 8: | ||
<!--T:2--> | <!--T:2--> | ||
Download the version without the logo on the screen [https://rutracker.net/forum/viewtopic.php?t= | Download the version without the logo on the screen [https://rutracker.net/forum/viewtopic.php?t=5001428 here]<br> | ||
Overall, this is a fairly convenient program that can be used immediately after installation without changing any settings. Install and use. | Overall, this is a fairly convenient program that can be used immediately after installation without changing any settings. Install and use. | ||
[[File: | [[File:Bandicam1.png]] | ||
<!--T:3--> | <!--T:3--> | ||
| Line 23: | Line 23: | ||
<!--T:6--> | <!--T:6--> | ||
By default, the video is saved to the directory C:\Users\username\Documents\Bandicam | By default, the video is saved to the directory <kbd>C:\Users\username\Documents\Bandicam</kbd> | ||
<!--T:7--> | <!--T:7--> | ||
This is a free version of the program, so there will be an inscription at the top. Also your FPS (frames per second) will be recorded by default. | This is a free version of the program, so there will be an inscription at the top. Also, your FPS (frames per second) will be recorded by default. | ||
<!--T:8--> | <!--T:8--> | ||
| Line 39: | Line 39: | ||
<!--T:11--> | <!--T:11--> | ||
[[File: | [[File:WindowsRec1.png]] | ||
<!--T:12--> | <!--T:12--> | ||
| Line 45: | Line 45: | ||
<!--T:13--> | <!--T:13--> | ||
[[File: | [[File:WindowsRec2.png]] | ||
<!--T:14--> | <!--T:14--> | ||
| Line 54: | Line 54: | ||
<!--T:16--> | <!--T:16--> | ||
By default, the video is saved to the folder C:\Users\username\Videos\Captures | By default, the video is saved to the folder <kbd>C:\Users\username\Videos\Captures</kbd><br> | ||
There is no need to configure anything additional; the default settings are suitable for recording video. | There is no need to configure anything additional; the default settings are suitable for recording video. | ||
| Line 62: | Line 62: | ||
<!--T:18--> | <!--T:18--> | ||
Download [https://www.nvidia.com/ | Download [https://www.nvidia.com/en-us/geforce/geforce-experience/ here] | ||
<!--T:19--> | <!--T:19--> | ||
| Line 71: | Line 71: | ||
<!--T:21--> | <!--T:21--> | ||
[[File: | [[File:Nvidia1.png]] | ||
<!--T:22--> | <!--T:22--> | ||
| Line 77: | Line 77: | ||
<!--T:23--> | <!--T:23--> | ||
[[File: | [[File:Nvidia2.png]] | ||
<!--T:24--> | <!--T:24--> | ||
| Line 83: | Line 83: | ||
<!--T:25--> | <!--T:25--> | ||
[[File: | [[File:Nvidia3.png]] | ||
<!--T:26--> | <!--T:26--> | ||
By default, videos are saved to the C:\Users\username\Videos\Nations folder | By default, videos are saved to the <kbd>C:\Users\username\Videos\Nations</kbd> folder. | ||
Just like in other programs, you don’t need to configure anything additional; the default settings are suitable for recording video. | |||
<!--T:27--> | |||
''[https://forum.bless.gs/index.php?/topic/52328-screen-recording-user-guide/ Source]'' | |||
<!--T:28--> | |||
[[Category:English page]] | [[Category:English page]] | ||
[[Category: | [[Category:Guides from our community]] | ||
</translate> | </translate> | ||
Latest revision as of 23:47, 17 October 2024
Video recording guide
Bandicam
Download the version without the logo on the screen here
Overall, this is a fairly convenient program that can be used immediately after installation without changing any settings. Install and use.

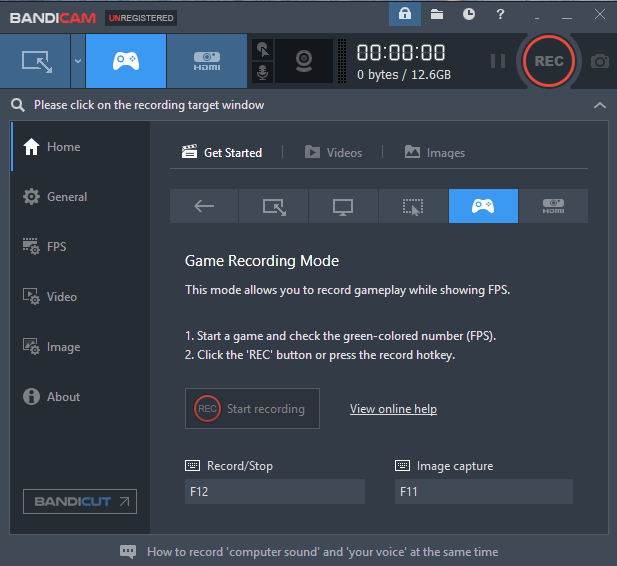
Select the joystick icon and press the red REC button
If you see that the window title appears at the bottom and the recording time has started to tick, then everything is going well. In this mode, only the game will be recorded.
By default, the video is saved to the directory C:\Users\username\Documents\Bandicam
This is a free version of the program, so there will be an inscription at the top. Also, your FPS (frames per second) will be recorded by default.
Windows recorder
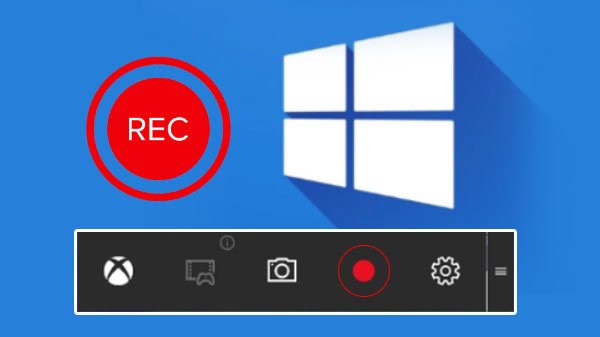
The program is installed by default on Windows 10 and 11. To launch, press Win+G in the window required for recording. A sign will appear
If you select yes, a recording interface window will appear.
When you press the REC button or the Win+ALT+R buttons, recording will begin. An indicator will appear in the corner of the screen
By default, the video is saved to the folder C:\Users\username\Videos\Captures
There is no need to configure anything additional; the default settings are suitable for recording video.
Download here
Screen recording program that comes with GeForce Experience. Available only for nvidia GeForce card owners!
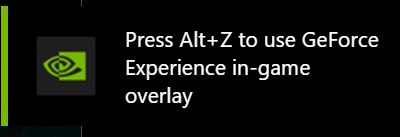
If you have the program running, then when you start the window with the game, a window will appear on the right
Click on it or press Alt+z, the general program interface will appear
Click on the record button or Alt+F9. These same buttons stop recording.
By default, videos are saved to the C:\Users\username\Videos\Nations folder. Just like in other programs, you don’t need to configure anything additional; the default settings are suitable for recording video.


